
How to connect your keyboard to MainStage 3
If you’re new to MainStage and you’ve downloaded Worship Start patches, one of the first things you’ll need to do is to connect your keyboard, your sustain pedal, your faders/knobs, and also your mod wheel to your concert/template—and this only takes a few seconds. And once you’ve done this, you shouldn’t have to worry about this step again, unless you begin using a new template, or you’re using another keyboard with the template. So let’s jump in!
1. CONNECT A USB CABLE
Connect a USB MIDI cable between your MIDI keyboard/controller and computer. If you’re using an older keyboard and you’re unsure how it connects to your computer, do a quick look up of your specific model and check the manual for more detailed instructions on MIDI connections.
2. MIDI IN MONITOR
Open up your template. Begin to press the keys on your keyboard, while at the same time checking the “MIDI In” monitor at the top of the screen. If you see note names and numbers appearing, it means that MainStage is successfully picking up incoming MIDI signal from your controller. If you don’t see any movement in the display, there is something wrong with the connection and you may need to consult your keyboard’s user manual. Here are some possible solutions:

A. Check that the USB cable is not loose or broken
B. Check that the USB cable is plugged into the right port on the back of your keyboard
C. Your keyboard may have internal midi settings that have been turned off.
D. Your keyboard may require a software download or MIDI driver to function properly.
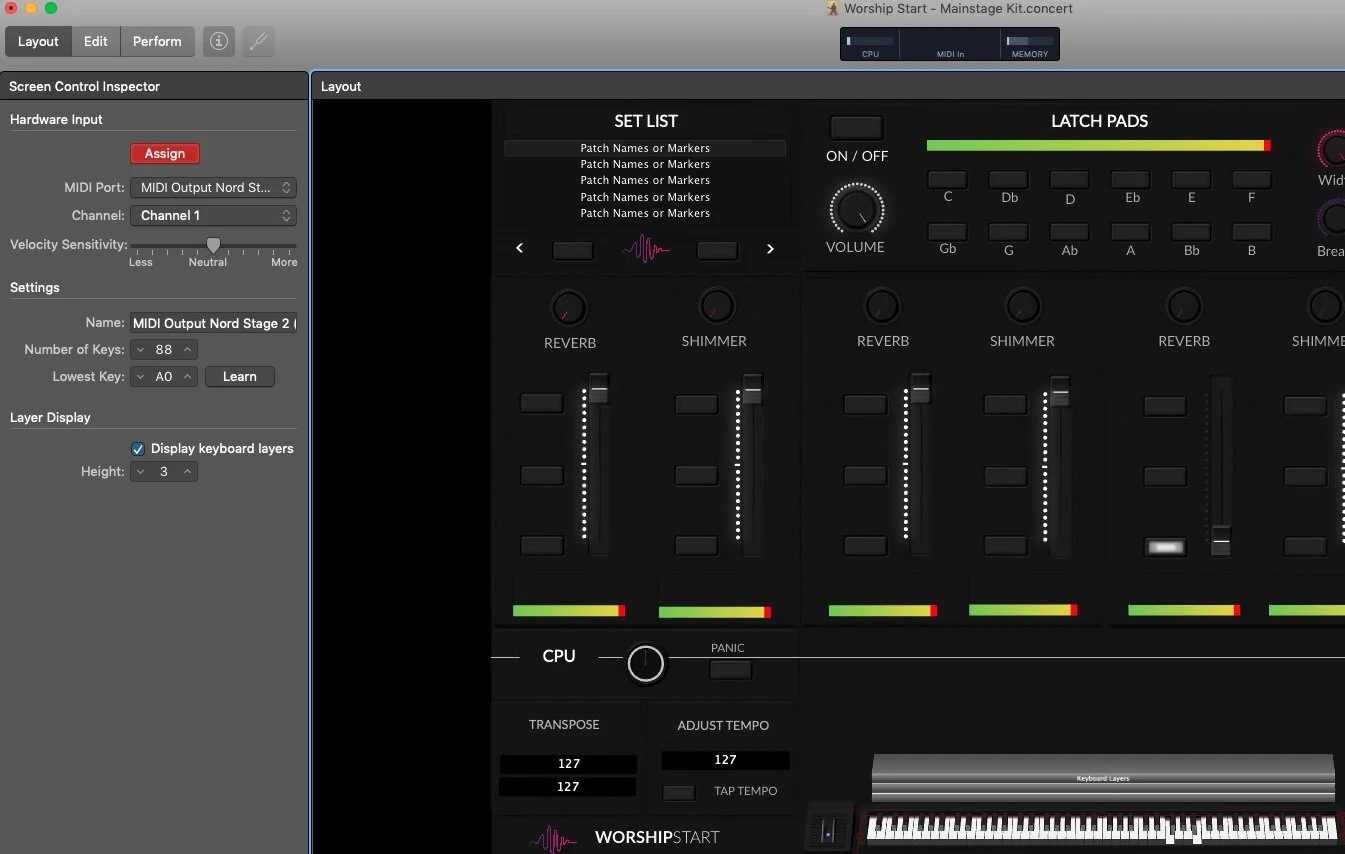
3. ASSIGN YOUR KEYBOARD
Once you have a successful connection, you now have to assign your physical keyboard to the digital replicate on-screen. To do this, head to the LAYOUT tab in the top left corner. Click on the on-screen keyboard, and then click the assign button. Once it glows red, play a few notes on your keyboard. If you’ve done this correctly, you should see the on-screen keyboard responding to your presses and see notes moving. Once assigned, make sure to off-click the assign button so that it does not glow red. This will ensure that you do not accidentally assign your keyboard to other unwanted parameters.
4. ASSIGN YOUR SUSTAIN PEDAL, FADERS/KNOBS AND MOD-WHEEL
Repeat STEP 3 and assign your sustain pedal, your faders and knobs, as well as your mod wheel. Again, you should see the on-screen parameters synchronize with your hardware control movements. (If you don’t have any faders/knobs on your keyboard, our template requires a Korg Nanokontrol 2).
5. SAVE YOUR CONCERT
Click on the EDIT tab in the top left corner, and then save your concert. This action will save your keyboard assignments to the template so that every time you open it, you won’t have to assign them again.
6. YOU’RE DONE!
If you are still experiencing issues with assigning your keyboard, the best thing to do is consult your keyboard’s user manual.